Insert Picture with Excel VBA
It is possible to go to a file and retrieve a picture and return that picture to Excel when a cell changes. This tutorial will take you through how to insert a picture in Excel using an on change event.
This article explains how to insert a picture automatically with Excel VBA. In the Top 10 Dashboard you can see how to insert a picture without VBA. The pictures are stored in the Excel file. This may not always be possible, perhaps you have 100s of pictures that you want to store. Size can be a bit of a problem in Excel after a while. The following article will focus on how you can have a list of pictures in a dedicated folder and as you type the name of that picture in Excel the picture will appear in the spreadsheet. It is a pretty cool Excel trick with VBA and could be quite useful to show descriptive information. It took me some considerable time to solve this problem the first time I attempted this. From memory someone posted the question on Ozgrid and I provided an answer. From memory the person could not see the pictures and I imagine that will be the case when you open the Excel file at the base of the page. Be patient. The pictures and the drive need to be exact and the picture names in your file need to exactly match the names in Excel. I suggest you create a list of all of the pictures you want included so the names exactly match the picture names in the folder.
I have set this procedure up so as you type values into Cells A10 to A20 the picture will be deleted in Column B and the new picture will be inserted and resized.
You can see from the above that I have 3 pictures which I am referring to, the exact names of these pictures are;
- Scientist
- Dashboard
- Report
The picture names are exact and they are in the following folder;
C:\Users\marcu\Desktop\Files\
A new picture will be imported as you type a name in Column A. You can create your own folder and have your own picture names. As I said earlier when you open the folder you won't see the above pictures as you can't access my C drive but I promise you that if you create an exact drive name with some random pictures of the same name they will appear in the file.
Format the Picture with VBA
The following can be used to change the format of the picture to fit in a particular area of the spreadsheet. As we are putting the picture in column B, the following will resize the picture for height and width and ensure the picture is aligned left and at the top of the cell where it is being placed.
.Height = 75
.Width = 75
.Left = Range(s).Left
.Top = Range(s).Top
The following is the worksheet change event code to run the procedure.
Private Sub Worksheet_Change(ByVal Target As Range) 'Excel VBA procedure to incorporate Pictures from folder.
Set rng = Application.Intersect(Range("A10:A20"), Target.Cells(1, 1))
If rng Is Nothing Then Exit Sub
GetPicture rng
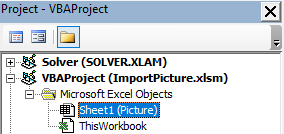
The above goes into the worksheet code that the pictures are going to be in. In the attached example there is only one worksheet so the pictures go into the Sheet1, worksheet VBA module.
The following is the VBA procedure which runs the process to get the picture from your file.
Sub GetPicture(r As Range)
Dim s As String
fName="C:\Users\marcu\Desktop\Files\" & r & ".jpg" 'Change path to suit.
s = "B" & r.Row
r.RowHeight=75 'pixels
On Error Resume Next
ActiveSheet.Pictures(s).Delete 'Delete the picture
Set pic=ActiveSheet.Pictures.Insert(fName)
On Error GoTo 0
If Not IsEmpty(pic) Then
.Width = 75
.Left = Range(s).Left
.Top = Range(s).Top
.Name=s
End Sub
The VBA program runs automatically when the designated cells change (A10:A20). The following is the Excel file but do change the file path for the pictures and do change the names to reflect pictures in your folder


