How to Insert an Excel Checkbox
In Excel, a checkbox is an box which when ticked is used to select or deselect an option. They are very common online on webpages and are surprisingly easy to apply in the Excel interface.
The following YouTube video takes you through the setup and practicalities of setting up check boxes in Excel. The following file goes with the video below.
To insert a check box you need access to the developer tab as a menu item in the ribbon. This will allow allows you to add form controls and active x controls to your Excel models. The developer tab has the checkbox control that we need to use to insert an Excel checkbox.
Below are the steps for getting the developer tab in the Excel ribbon.
Customising the Ribbon
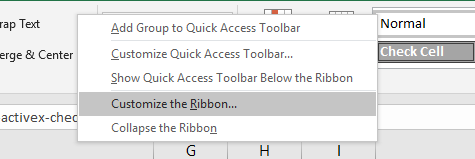
To add the Developer tab - Right click on any of the tabs in the Excel ribbon and choose Customise the Ribbon.
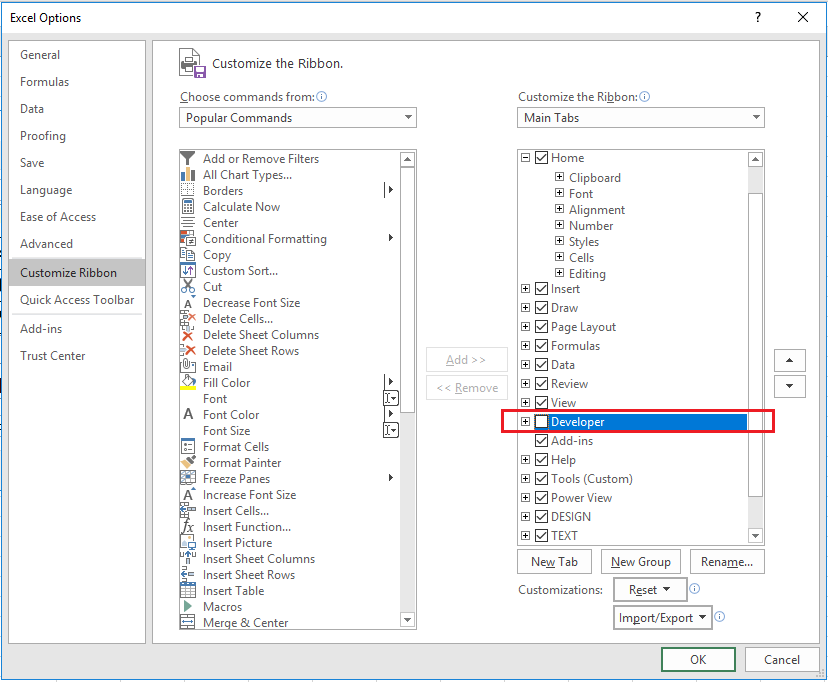
A second dialog will appear.
Tick the Developer check box and click OK.
When the developer menu is inserted we are ready to create our checkboxes.
Insert the Excel Check Box
The following are the steps to insert a checkbox in Excel:
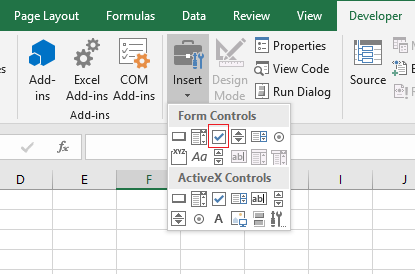
Choose the Developer Tab - Form Controls – Check Box (form control).
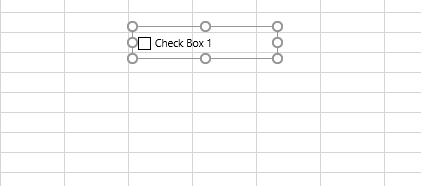
You will be presented with a Cross Hairs + so draw a rectangle with the mouse.
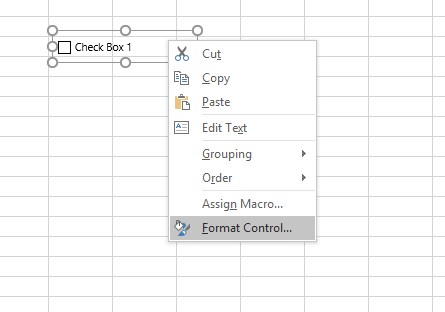
Right click on the check box and choose Format Control.
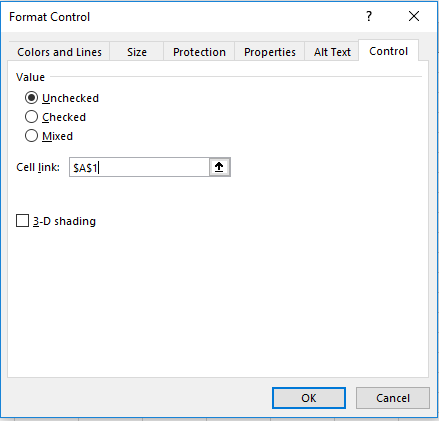
Choose a cell for the output of the checkbox. The checkbox will produce a TRUE or FALSE output.
In the above example we shall choose A1 as the output for the check box.
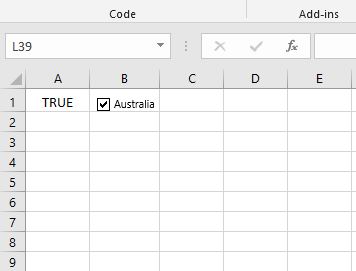
Give the checkbox an appropriate name.
Now as you tick the check box the cell in A1 will be made TRUE. Untick it and cell A1 will be FALSE.


